Saturday 23 October 2010

Macaroni Cheese

When it comes to Macaroni Cheese, homemade is definately the best! I've tried stuff from tins - (I can't believe people buy it!) 

So here's how we make ours. 

What you'll need (to feed 5-6 people):
3 heaped cups of Macaroni (or any other pasta shape you like)
4 tbls flour
4 tbls butter
1 1/2  pints milk (plus more if needed)
1 tsp Mustard (either powdered or sauce, any type is fine)
3-4 cups grated Cheese
1 Onion Sliced, and lightly sauted (OR leave raw for a stronger taste - I prefer raw)
2-3 Tomatoes Sliced
Salt & Pepper


How to Make:
~Begin by cooking the pasta (macaroni or whatever you are using) in a pot with plenty of water to cover and with a generous pinch of salt. Cook according to the packets instructions. Drain and set aside.

For the cheese Sauce:
~Meanwhile, in another large, deep pan melt the butter over a low heat WITHOUT letting it bubble.
~Once it has just melted, add the flour and stir to form a paste. Cook this paste over a very low heat for 3 minutes, stirring frequently to cook evenly and prevent the flour burning.
~Remove pan from heat. Gradually (splash by splash) add the milk to the flour paste. Stir thoroughly with each addition, until all milk has been added. NOTE: If you add too much milk at once, you will end up with lumps. If you happen to do this, you can take a hand whisk and give it a good whisking to beat out the lumps.
~Return the pan to a low medium heat stirring constantly. The sauce should slowly start to thicken, to the consistency of double cream.
~Now that the sauce is bubbling, add the mustard, cheese (reserve 1 cup cheese for the top if choosing to bake), onions, salt & pepper to taste. Cook for a further 5-10 minutes until the cheese has melted. The cheese will make the sauce thicker. It should be no thicker then custard. If too thick, you can add a little more milk to thin it down - remember to check seasoning.

~Remove cheese sauce from heat. Add the cooked pasta to the cheese sauce and mix thoroughly.
You are welcome to eat the pasta as it is by heating through over a stove top
- OR -


~Empty the complete contents of pasta and sauce into an oven dish. Top with the grated cheese and the sliced tomatoes. (you can also add peppers or extra slices of onion)
~Bake in oven on Gas Mark 5 for 30-40 minutes till Cheese is bubbling and pasta is thoroughly heated through. 

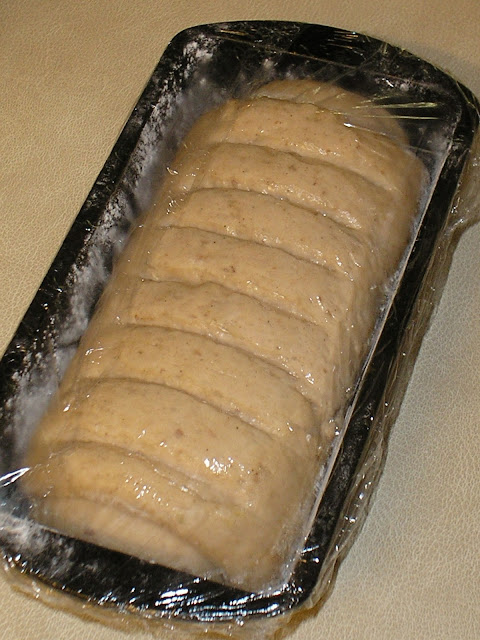
You may have noticed from the pictures, that the cheese does not look properly melted or golden. That is because this dish was made in advance and baked later that evening. 


This is the great thing about pasta bakes. They can be left, ready prepared and in their baking dishes in the fridge and baked either later or the next day.


Friday 22 October 2010

Wontons or Dim Sum

I've been wanting to make Wontons for ages now. I have seen them being 'eaten' on the net and they LOOK really interesting. So I searched over recipes and I came across a recipe for Steamed Cabbage Rolls with chicken, by Jamie Oliver in his cookbook Jamie's Kitchen. It was the recipe that I seemed to have all the ingredients for, so I rolled up my sleeves and set about making them.
I have to admit, they weren't popular with everyone in my house, probably because I had not added enough saucey things to the filling to make it very tasty. Nevertheless, my sister and I had fun steaming them & a funnier time eating them! (I had to be authentic and use a pair of chop-sticks, which I was hilariously useless at!)
But I noted that next time I would definately need to increase the flavouring quantities.


Chicken & Cabbage filling for both Wonton & Cabbage Roll


Uncooked Wontons, filled with chicken mixture.


I made the Wonton wraps from scratch. Pretty easy to make, although wonton wrappers are easily available pre-made & frozen.
It asked for 2 cups of flour and 1/2 cup of Hot Water. I ended up with alot of leftover pastry..so, 1 cup flour would have been enough, for the 1/2 kg Chicken mince. I also used a pasta machine to roll the pasta sheets thin and even (An amazing invention if you ever get yourself into making things like I do!).
Cabbage wrapped round chicken filling.
Wonton held with my Chop-Sticks.
Wontons can actually be cooked in a number of ways. They can either be Steamed (as in the pictures), Boiled in a soup broth (a simple chicken stock with added vegetables, such as onions, spring onions, chinese cabbage and so on), Deep Fried, or Pan Fried (by cooking in a frying pan with a little oil on ONE side only till browned, then adding a splash of water, covering quickly with a lid and lowering the heat so that they steam through and complete the cooking). 
They taste great dipped in Sweet Chilli Sauce or Soy Sauce.

Thursday 21 October 2010

Chocolate- Nutella Thumbprint Cookies

Chocolate- Nutella Thumbprint Cookies

I receive a daily email with loads of crafty projects, blogs and the like, including the occasional recipe. Today, they had this recipe to share. Oh man! They look so yummy!!.....
(Click on the link to go get the recipe)


....If you make these before I do, please let me know about it! 

Wednesday 20 October 2010

Make your requests..

Hi peeps!
Please feel free to add your comments and requests. I have now made it possible for all to post comments, whether you are a member or not.

And I would also like to thank all of you for showing interest in my food blogs.
xx

Tuesday 19 October 2010

Cheesy filled Jacket Potatoes


 This is a good way to use up leftover boiled or baked potatoes. I have yet to come across someone who doesn't like a good old comforting jacket potato.

You can use any filling of your choice, but if using a cold, cooked (from the fridge) potato, then simply microwaving the potato alone will make it feel a bit rubbery. By mixing the potato up with cheese first, you can easily disguise this.

Potato, spring onions, cream cheese, salt & pepper.
Begin by cutting the potato in half and scooping out the potato with a spoon. Place the potato innards into a separate bowl. Here I added, 1 chopped spring onion, 1 tbls Cream Cheese with Chives, and a sprinkle of pepper and salt. 
More ideas:
~You can add normal grated cheese to make it more cheesey. 
~Add 1 tbls milk to make a softer creamier filling.
~Add a small nob of butter for extra richness and creaminess.
~A little chopped fresh tomato; sundried tomato; smoked salmon; onions; fresh green/red pepper; chilli sauce; baked beans; cooked meat; ...you name it! You can turn it into a real meal as you like.

Refilled spuds, topped with cheese slices.


Mix all your fillings together with the potato and carefully refill the empty potato skins with the mixture.
Then, top them with a slice or two of cheese or your choice. (I used normal cheddar)

If you don't have much time on your hands you can pop in the microwave for a minute or until cheese has melted.
Or, place under a grill, on low to gently heat through and turn the cheese bubbly and golden.
Or, place them in a baking tray and in a warm oven till golden and cheese bubbling.


Monday 18 October 2010

Chickpea Curry with Naan

 This is one of many curries I can make in the, more or less, traditional way. Its pretty easy to make and fairly inexpensive. It can be served with either Roti, Naan or Rice.

These chickpeas were the dried type, although, I would usually use the tinned.

To make it you need:

2 tins Chickpea
1/2 tin Chopped Tomatoes
2 medium Onion - finely Chopped
2 Garlic cloves - grated/crushed
1-2 Fresh green chillies
1 inch Ginger - grated/crushed
1 tsp Salt
1 tsp Chilli (more or less depending on your taste)
1 tsp cumin seeds
1/4 tsp Turmeric
1/2 tsp Ground Coriander
Vegetable Oil
Optional:
Fresh Coriander
Lemon Juice

How to Make:
1. Begin by heating 4 tbls oil in a pan.
2. Add onions and fry on medium heat till softened but not browned.
3. Add garlic and ginger and fry for minute or so.
4. Now, depending on how Hot & Spicey you like your curries to be, you can either leave the chillies whole to give off a subtle heat, or chop to realease more of the chillies heat. Add these to the pan.
5. Add the spices & salt. Stir into pan to allow heat to realease their fragrance.
6. Then add the chopped tomatoes.  Cook the tomato mixture on a low heat till the liquid has reduced and the tomatoes to have turned into a rich paste.* This can take up to 10-15 minutes.
(*Generally, the art to a good curry is in the rich thick Masala or curry paste. Typically, this tomato mixture should be cooked till both the onions and tomatoes have softened and broken down to become a thick smooth paste.*) 
7. Once the tomatoes have become thick and reduced, add the 2 tins of chickpeas along with the liquid from the tin. Cook on a medium high heat, till the liquid has reduced. Remember, you will need to stir frequently to prevent sticking, particular as it starts drying.
8. Once the water has reduced, you have two options. You can add a little extra oil ( a tablespoon or so) which will give it a lovely rich sheen, and serve it as a 'dry' curry to go with Roti's or Naan. Or, you can add about a cup of water to produce a gravy great for both Rice or Roti. In my house, my family prefer it drier and richer, yet I occasionally prefer to have some gravy to soak up with Roti's.


Sunday 17 October 2010

Fruit Pie


Fruit Pie using cooked fruit, such as apples, pears, dried apricots, plum...or any fruit that has been sitting in that fruit bowl, and of course, Ready-to-roll pastry.

The last of the Home Grown

Ridge Cucumbers. Small, Fragrant & Sweet.
These were the last pictures I took of the veg I was growing in my back garden.
There's a great deal of satisfaction being able to pick something from your own garden and bring into the kitchen for everyone to eat!
This year I tried growing the most I've ever attempted before. I failed with my courgettes, squashes, and sweetcorn..none of which produced anything edible.
Things which I did have success with were, Rhubarb (lovely in crumbles and pastry tarts), potatoes, tomatoes, runner beans, cucumbers and peppers.


Tomatoes..easy to grow & usually sweet.
Tomatoes are one of the easiest to grow..or at least one of the most commonly grown vegetable. They crop easily and abundantly with just a little feeding and watering. The also taste far nicer and sweeter than any shop bought tomato.

First time peppers. Very healthy plant & crops.
I just loved watching these peppers grow. It was the first time growing peppers and I most definately will be growing them next year. They were as easy, if not easier than tomatoes to grow. They didn't need staking as the stems were pretty strong. I hope to try a few other varieties of peppers, chillies included next year.

Friday 15 October 2010

Vanilla Sugar

Making your own Vanilla Sugar is a great way to flavour your cakes and desserts with the fresh smell of real vanilla. This method is very simple, yet it enables the vanilla to go further, as real vanilla pods aren't cheap. Its a good idea to buy Castor Sugar for this, as it is what most cake and biscuit recipes call for.
So all you will need is:
1 Vanilla Pod and
1 Bag (1 kg) Castor Sugar
plus a container of sufficient size to store the sugar in.


Simply take the vanilla pod, and slit it in half length-ways, with a sharp knife. Carefully scrap out the seeds with the tip of a knife and mix into a small amount of sugar. The vanilla seeds are a little oily, so this will help to disperse them thoroughly before adding it to a large amount of sugar.
Thereafter you can then mix the whole bag of sugar to the vanilla seeds, including the empty Pod, to the container. Better still, break or cut the Pod into 2 or 3 pieces first, which will allow the aroma to reach the sugar in more areas.


You can use the sugar as soon as you've made it, or allow it to stand for a few days to let the aroma to spread. Use sparingly for a faint scent in your cake and biscuit recipes. For example when measuring out the sugar for a recipe, you can add 2 or 3 tablespoons of your vanilla sugar before weighing out the rest of the sugar needed.

Sausage Roll in the Making


These Sausage Rolls were made by my lovely mum just yesturday. She makes the best English food in town, I'm sure of it! She is fondly known for her baking skills, particularly because long ago she was once a pastry chef. But as time has gone on and the typical demands of life continue, she prefers to take advantage of the ready-to-roll pastry that are on the market. They are massive time savers to say the least. Yet the good thing is that at least there is still that element of 'homemade' in the pies and pastry's she makes.
I decided to document each stage of the making of my mums sausage rolls for those who have never made them. It's an extremely straight forward process, yet they make the best finger food for traveling, taking on picnics and parties.


What you will need for making these scrummy Sausage Rolls.
Makes about 24 bite-sized pieces. 
1 packet of 'ready-to-roll puff pastry (or pastry you prefer)
1 packet of Sausages (we buy the Halal type, either spicy or mild)
Milk (roughly 1/4 cup) for brushing
Little oil for greasing the baking tray.
Flour for dusting rolling out surfaces.


STEP ONE: 
Both sausages and pastry, if frozen, must be defrosted completely.
Lightly flour your surface & roll out pastry into a long rectangle. Roll to the thickness of a £1 coin.
(The dough we rolled out, I would say, measured 10inches by 5inches. However I'm just estimating, I didn't measure..but its to give you a rough idea.)


STEP TWO:
Using a knife, cut the pastry evenly in half length ways. You will have two lengths of pastry to work with.
TAKE NOTE:  The sausage has a thin membrane skin covering them, which needs removing. To do this, hold onto one end of the sausage and carefully push out the meat filling onto the pastry. Don't worry if it gets messy. Once you have enough sausage meat to run along the length of each pastry, you can then gently mold the meat into shape.


STEP THREE:
Now take your milk. For sake of ease, pour a little of the milk into a cup or bowl. Using your fingers or pastry brush (whichever is closer..haha..we use fingers) brush only one edge of the pastry with the milk, keeping the other edge dry. This will help the pastry to seal nicely.


 STEP FOUR:
Fold over the pastry, sandwiching the meat inside the pastry. Press the pasty edges down carefully to seal. Repeat for both rows.


 STEP FIVE:
Take a fork, and press down the folded edges firmly, but not to the point that pastry sticks to the table or surface.


 STEP SIX:
Taking the bowl of milk again, brush the entire surface of the pastry with milk.
(Notice the sheen?)


 STEP SEVEN:
Using either a sharp knife or fork, make small  incisions, or poke holes along the top of the long sausage roll.


STEP EIGHT:
Cut into even size pieces. You can gently mark out your pieces using a knife, to make them equal first, before cutting.
Ours were cut into roughly 2 inch pieces.


 STEP NINE:
 Grease a baking tray.
Arrange your mini sausage rolls along the greased tray leaving about 2cm between each roll. 
(Remember, puff pastry will increase in size a little.)


 STEP TEN:
Bake for about 10 to 15 min or until golden brown.
(Don't they look irresistible? They were! I chomped one almost immediately after I took this picture..yum!)


So there you have it! If you don't end up eating them all immediately, they can safely be stored in the fridge or even frozen for a 'sunny' day when you decide on a picnic, or for those unexpected guests. Just  pop in the oven till heated through and crispy, or quicker still, defrost lightly in the microwave first before bunging them in the oven.

Thursday 14 October 2010

Week of Food Overview

So, on our menu today is Curries. (yep, in the plural) 
I love cooking curries and we usually have a fair bit leftover on the days I've made it. So over the space of a month or two, we would have accumulated various containers & boxes of curries in the freezer ready to thaw and become an Indian Family Feast. I will try to take pics of them in their ready-to-eat 'pose'. 

Meanwhile, you can take a peek at some of the things that have been cooking up within the recent few days. I do most of the cooking at home, but my mum also loves cooking, more englishy things like pies, pastries and especially fishy dishes (her FAV.!). My sister has become the home-baker. So, naturally I am obliged to give them the chance to express their foody-creativity too!


My mums Bhajiahs, with my homemade Sweet Chilli Sauce
 My mum isn't much of a curry queen. Failing miserably in my dads Curry Ranking system. However, one thing no one seems to make better then she does, is her homemade Bhajiahs. Bhajiahs are a type of fried fritter. Usually the main ingredient is Gram Flour (translated as Chana or Chickpea Flour). It is also one of the best ways to use up any cooked veg from roast leftovers and the like. Infact almost anything can be put into it, along with a good dose of Chilli, Salt and Spices, and of course plenty of fresh, thinly sliced onions.


A Bowl of another of my soups. This one is Spicy Thai inspired.
 As I have already mentioned, I am becoming more interested in Soups. For one, they're fairly easy to throw together; two, they can be made to be healthy and nutritious; three, they make a filling yet, light meal which doesn't have to bloat you out; and lastly four, they are SO versatile. Its the equivalent to a standard meal with a few cups of liquid added to make a wet meal rather than dry. The liquid makes you feel fuller, yet the calories will work out to be far less...........have I sold the idea to you yet?!?


Whats in the Soup? Carrots, Mushrooms, Chicken, Noodles Onions.....and more

*Hahaha* (laughing weakly). Talking of healthy stuff, here is a load of delicious and sugary Donuts to balance out the healthy Soups. (ONLY JOKING)
Of course, even the healthy experts that rant and rave all the time about being health conscious, MUST have their Sugar and Carb fix at some point! I'm SURE OF IT! (correct me if I'm wrong)

These were made by my sister, the recently crowned the baking queen. They were so good. 


Cinnamon Sugar coated Ring Donuts

Wednesday 13 October 2010

Warm in the Kitchen with Green Soup

Today is pretty cold, glum and still. Even still, I'm not one who is bothered if there's rain or shine. I like all weather and see the beauty in it all.
Having said that, when it comes to food..well, I think we all like to cook according the weather at some point or another. So, it being cold, and as the weather continues to decline in warmness, it can be safely said that Soup Season has made its entrance. 
I love soup. As a kid I didn't care for it much. But as I get older and 'wiser' I see that soup lends a helping hand when we need it. When we're ill with a cold, a steaming bowl of soup is just the remedy. At least it helps the warming process. But soup to me has almost become my staple, as I ever increasingly become aware of its health benefits and my own unhealthy eating habits. So, whenever I feel I have deprived my body of real nourishment I whip a pot of soup.

I flicked through a load of recipe books trying to find the recipe that not only took my fancy but that I had all, if not most of the ingredients listed. But, as usual........I hardly ever stick to what the book says! 

So this is what I finally concluded after all my page flicking and finger drumming...

..It was this Green Soup. 
A warming and revitalizing soup.. Just what you need when its cold.

Serves: 4 as Light Lunch or Starter

Ingredients I used:
1 small piece of chicken (any with bone) 

1 onion 
1/2 stick celery
1/2 green pepper
1 very small potato (the size of an egg)
1 1/2 cups peas
1/2 cup spinach leaves
4 spring onions
1 clove garlic
1/2 inch piece of ginger
Fresh Ground Pepper & Salt
1/2 tsp of Fresh grounded mixed spices. (Curry Powder or the like can also be used.)

I began by roasting the chicken piece in the Oven. I usually wouldn't have bothered, but my mum already had the oven on, so I just made use of it.
Meanwhile I chopped all the veggies to even small dice.
I fried the onion, with the garlic and ginger till slightly browned. Then in went the pepper potato & celery. I sauted them for a few minutes.
Then I put in the spices, and Ground pepper and chicken.
After I added the peas and 1 tall glass of water (about 2 cups). I waited till it boiled then lowered to a simmer and a level tsp salt (or to taste)
Once the veggies were tender, I poured out two thirds of the soup into the blender. (Being careful not to drop the chicken) This was blended till smooth then re-added to the pan.
Finally, I added the chopped spring onions and spinach and heated through for another 5 minutes.

I would probably add a blob of yoghurt or sour cream into my bowl of soup for a creamy tangy addition.
Voila.
A healthy Green soup full of flavour. Perfect for today's glum weather and also good for feeding my body the well needed nutrients.

Tuesday 12 October 2010

Date & Walnut Loaf

Ok....I'm here to show you my Date & Walnut Loaf I was talking about previously.
As I said, I stupidly forgot to put the yeast in the breadmaker first time around when making this dough. So I put the whole lot back into the breadmaker ALONG with the yeast this time, and voila! It turned out fine in the end!
Don't we all just love happy endings.
Well, the only thing that was noticibly different, was that the dates had been safely mashed up into the dough....so the dough ended up being on the tanned side.

Here's how to make it (without the mistakes)

Date & Walnut Loaf with Cinnamon Swirl
This Bread turned out really soft and light. I couldn't slicing the bread as soon as it was out the oven. Delicious spread with butter. Mmmmm!


Ingredients:
125ml/ 1/2 cup semi-skimmed or whole milk
125ml/ 1/2 cup water
1 large egg yolk
3 tbsp melted butter
4 tbsp sugar
1 tsp salt
450g/16oz/ 3 cups strong white bread flour
1/4 tsp instant or fast-acting yeast

Additional ingredients for Date & Walnut:
2 tsp ground mixed spice or allspice
50g/2 oz/ 1/2 cup roughly chopped walnuts
75g/ 3oz/ 5/8 cup chopped dates.


Cinnamon Swirl:
2 tbsp Butter (softened)
2 tbsp Sugar
1 tbsp Cinnamon

If your lucky enough to have a breadmaker like I am, then you can follow along like so:

First add the Water, Milk, Butter, Sugar, Salt and Egg Yolk. (If making Date and Walnut, add the Mixed Spice or Allspice now.)
Next, Add your flour, and then your Yeast. (Yes, remember the yeast!!)
Set Breadmaker Program to either to Basic White Program if you intend to bake in the breadmaker.
Follow your breadmakers instructions as to when to add the additional dates and walnuts.
 Usually it will beep.The leave the breadmaker to do its job and rise and finally bake your bread.

Or, if your like me, you can set it to the 'Dough' setting, which simply does the mixing and rising for you, yet allows you to remove the dough before baking so you can shape it and cook it in a conventional oven the way you like. If you are going for this method, continue the rest of the steps below.

Remove the bucket from the machine.
(Now turn on your oven so it warms up for a few minutes during the next steps)
Remove dough from bucket onto a floured surface. Knead very gently twice or thrice. 
Pat the dough flat down so it becomes a long rectangle. (Add more flour to work surface if necessary to prevent sticking)
Spread the butter over the dough, then sprinkle the sugar and cinnamon evenly over butter. Roll up and squish the dough if necessary to fit bread tin.
Flour or lightly grease bread tin before placing the dough inside. 
Now, TURN OFF the oven. (The oven should be a nice warm temperature for the dough to rise quickly.)
Cover Dough with greased Clingfilm then place in warm oven to rise for 30 min. 


Rolled and shaped dough in a floured bread tin. 


Once risen. Turn oven to Gas Mark 4 and Bake for 35 / 40 mins.

Date & Walnut Bread  Swirled with Cinnamon. Yum!